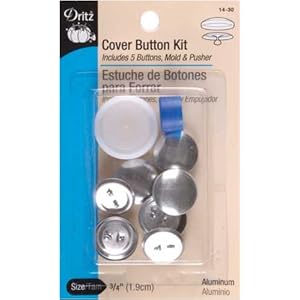
I cut some fabric from the scraps I already had and covered the 5 buttons. I then removed the piece on the back that allows you to sew the button to fabric. Lastly I hot glued the button the the bobbi pin.
The bobbi pins to the right are even simpler to make. I took some white buttons and threaded each with a different color. The button was then hot glued onto a regular bobbi fins. Finished! Easy peasy and a handful of cute hair accessories.
The tray is the one that I made here several months ago.
Have a sweet day!


These certainly are cute and quick to make! Thanks for sharing!
ReplyDeleteThose are super cute and I have all the supplies in my house already. I have to try this for my daughter. Thanks for sharing at my Swing into Spring party.
ReplyDeleteSuper Cute blog!! :) I am your newest follower! I will definitely be keeping an eye on your blog to learn new things!! If you would like to take a look at my blog that would be wonderful and follow me back! For-The-Luv-Of.blogspot.com Look out for some giveaways also like mineral make-up. I am new to this but excited to share ideas on yummy food!
ReplyDeleteThanks,
Brooke
Very cute idea, I really like it!
ReplyDeleteHugs, Cindy
These are cute! My daughter just asked me to get her some decorated bobby pins, now she can make them! Thanks for sharing.
ReplyDeleteWhat a pretty way to dress up bobby pins!
ReplyDeleteSo cute! I'm totally impressed you got those button covers to work. I've tried and can't do it!
ReplyDeleteGreat idea - these look like heaps of fun to make!
ReplyDeletevery cute! i really want to get some of those button making kits!
ReplyDeleteVery cute and easy! I'm glad you found our blog so we could find yours, I love it. :)
ReplyDeleteYou should edit your profile in blogger dashboard by the way to "show your email" so that people can email you back when you leave comments.
Kathy